Designing a basement laundry room is one of the most rewarding home improvement projects you can undertake. A well-planned laundry space transforms a dark, underutilized area into a hardworking room that supports your household routines every single day. When thoughtfully designed, it becomes more than just a utility zone — it becomes an organized, efficient, and even enjoyable part of your home.
Many homeowners overlook the potential of their basement laundry area. They settle for cramped layouts, poor lighting, and inadequate storage. But with the right approach, your basement laundry room can rival any above-ground space. Thoughtful planning and smart design decisions make all the difference between a frustrating chore zone and a seamlessly functional workspace.
This guide walks you through every essential element of basement laundry room design. From plumbing considerations and layout planning to lighting upgrades and storage solutions, each section provides actionable advice. Whether you are starting from scratch or renovating an existing setup, these strategies will help you maximize every square foot of your basement laundry space.
1. Assess Your Basement Space and Layout
Before purchasing a single fixture or cabinet, start with a thorough assessment of your available space. Understanding your basement’s dimensions, ceiling height, and existing infrastructure shapes every design decision. Accurate measurements are the foundation of a functional layout.

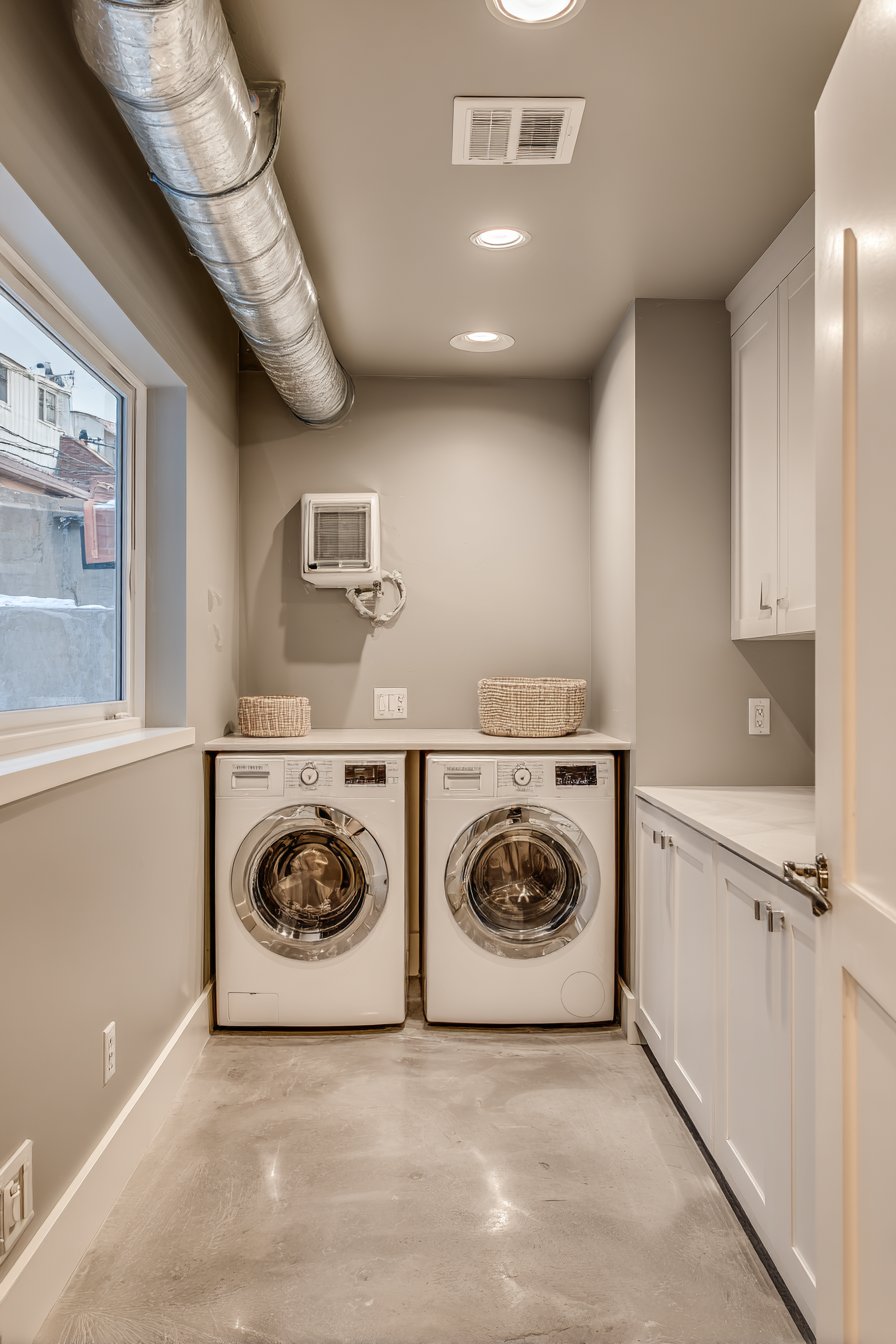
Walk through the space and note the location of existing plumbing lines, electrical panels, HVAC equipment, and support columns. These fixed elements significantly influence where appliances can be placed. Many basements have low ceiling clearance around beams or ductwork, which affects what cabinetry and shelving you can install overhead.
Consider how the laundry room integrates with other basement functions. Some homeowners share the basement with a storage area, home gym, or recreation room. Zoning the space with clear visual or physical boundaries keeps the laundry area contained and organized without sacrificing flow.
- Measure ceiling height, floor dimensions, and doorway clearances carefully
- Map out existing plumbing rough-ins and drain locations before planning layout
- Identify structural columns or beams that may limit cabinetry placement
- Note the location of the electrical panel for safe appliance positioning
- Consider natural traffic flow between laundry and adjacent basement zones
- Account for clearance space in front of all appliances for comfortable operation
2. Plan Your Plumbing and Drainage Strategically
Plumbing is the most critical technical aspect of any laundry room design. In a basement setting, drainage presents unique challenges because you are often working below the main sewer line. This means standard gravity-fed drainage may not be sufficient.
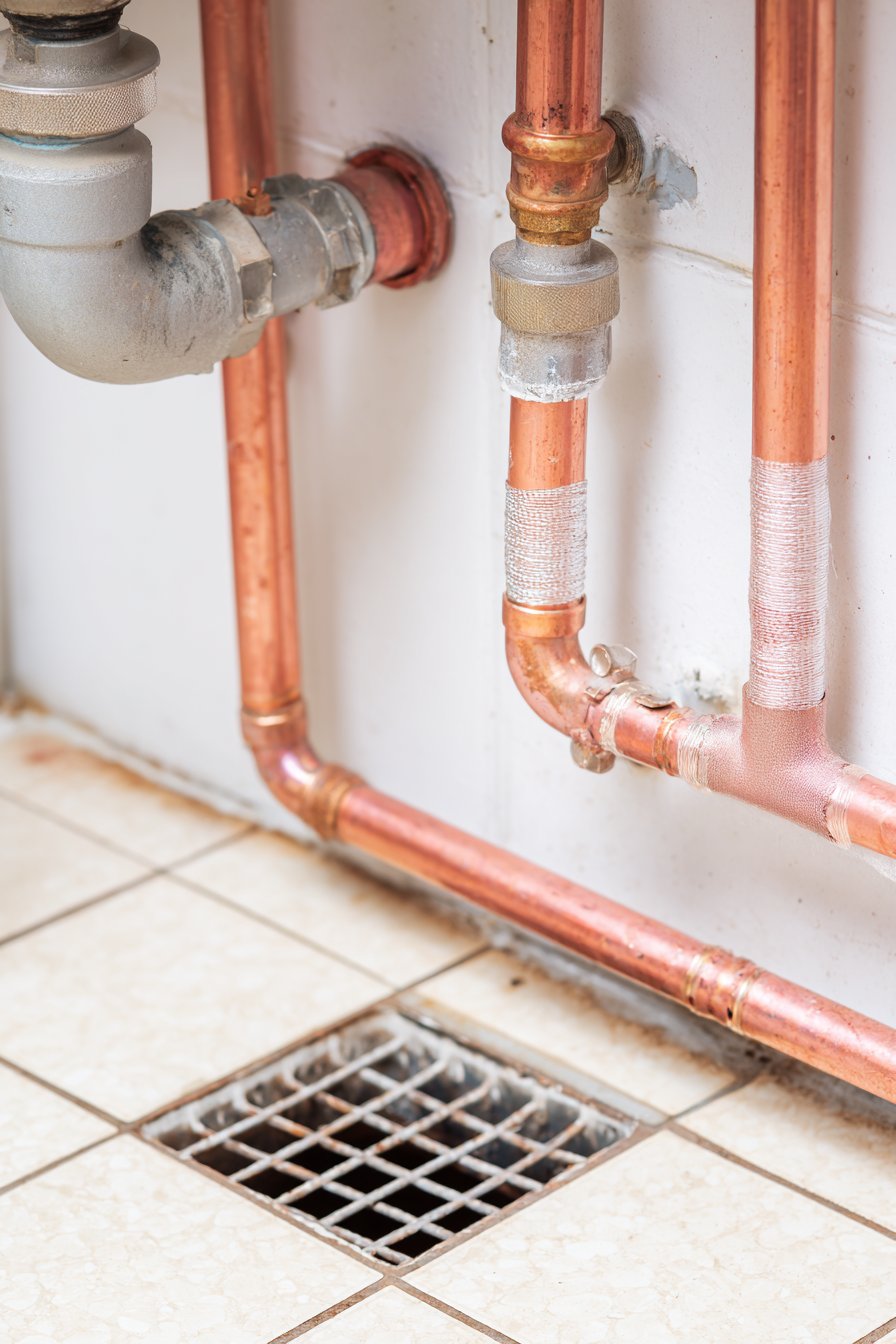
If your basement floor drain sits below the municipal sewer line, you will need a sewage ejector pump or macerator pump system. These systems pump wastewater upward and into the main drain line. While they add cost, they are essential for safe, code-compliant installations and prevent dangerous backflow situations.
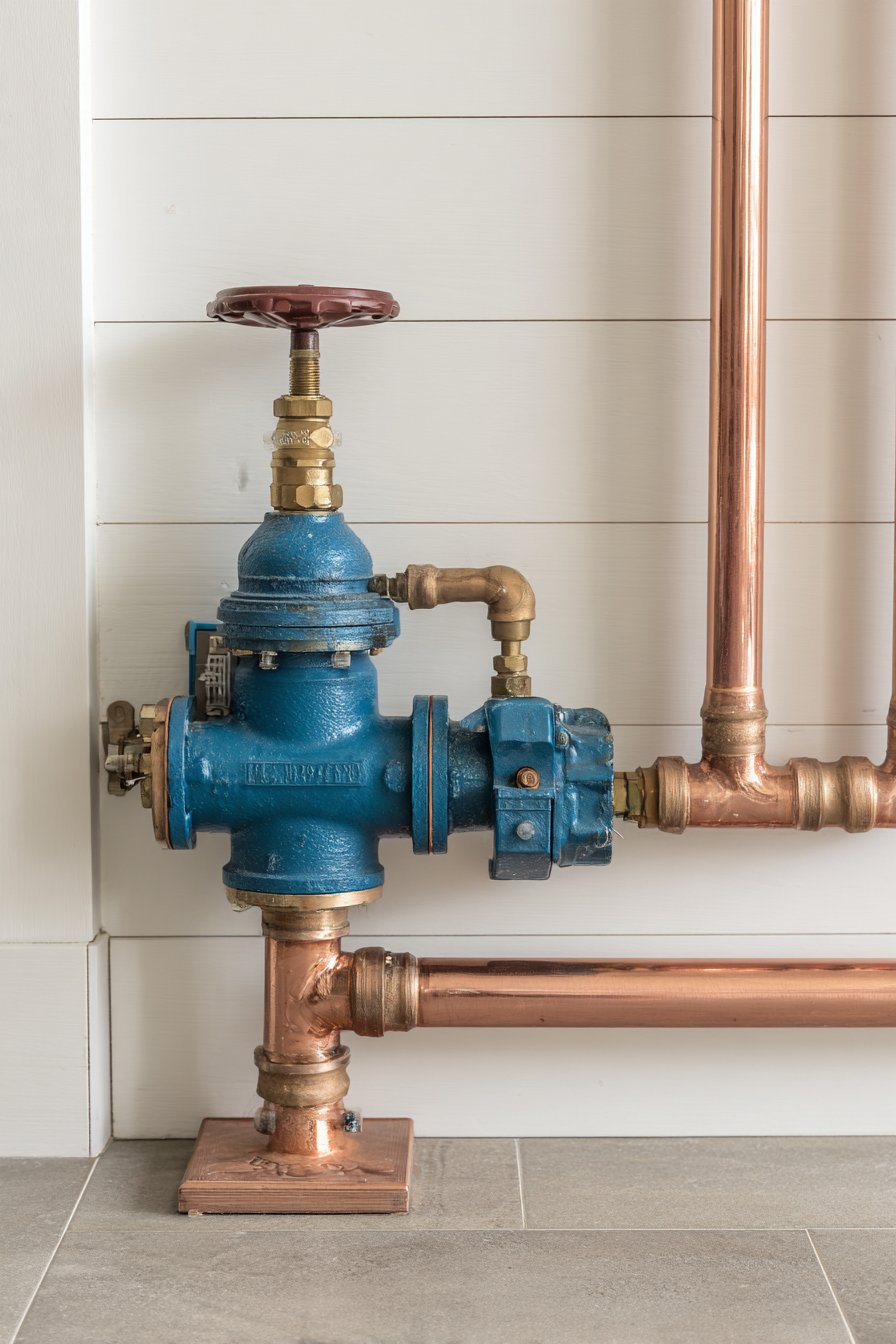
Hot and cold water supply lines need to reach your washer location. When planning, minimize pipe runs as much as possible to reduce installation costs and the risk of freezing in colder climates. Insulating pipes in unheated basement areas is a smart long-term investment that protects your plumbing infrastructure.
- Consult a licensed plumber before finalizing your layout to assess existing rough-ins
- Install a sewage ejector pump if your floor drain is below the sewer line
- Insulate all exposed water supply pipes to prevent freezing during winter months
- Include a floor drain in your design as a safeguard against washer overflow
- Ensure hot water supply reaches your washer for effective cleaning performance
- Plan pipe access panels into your wall design for future maintenance ease
3. Choose the Right Appliance Configuration
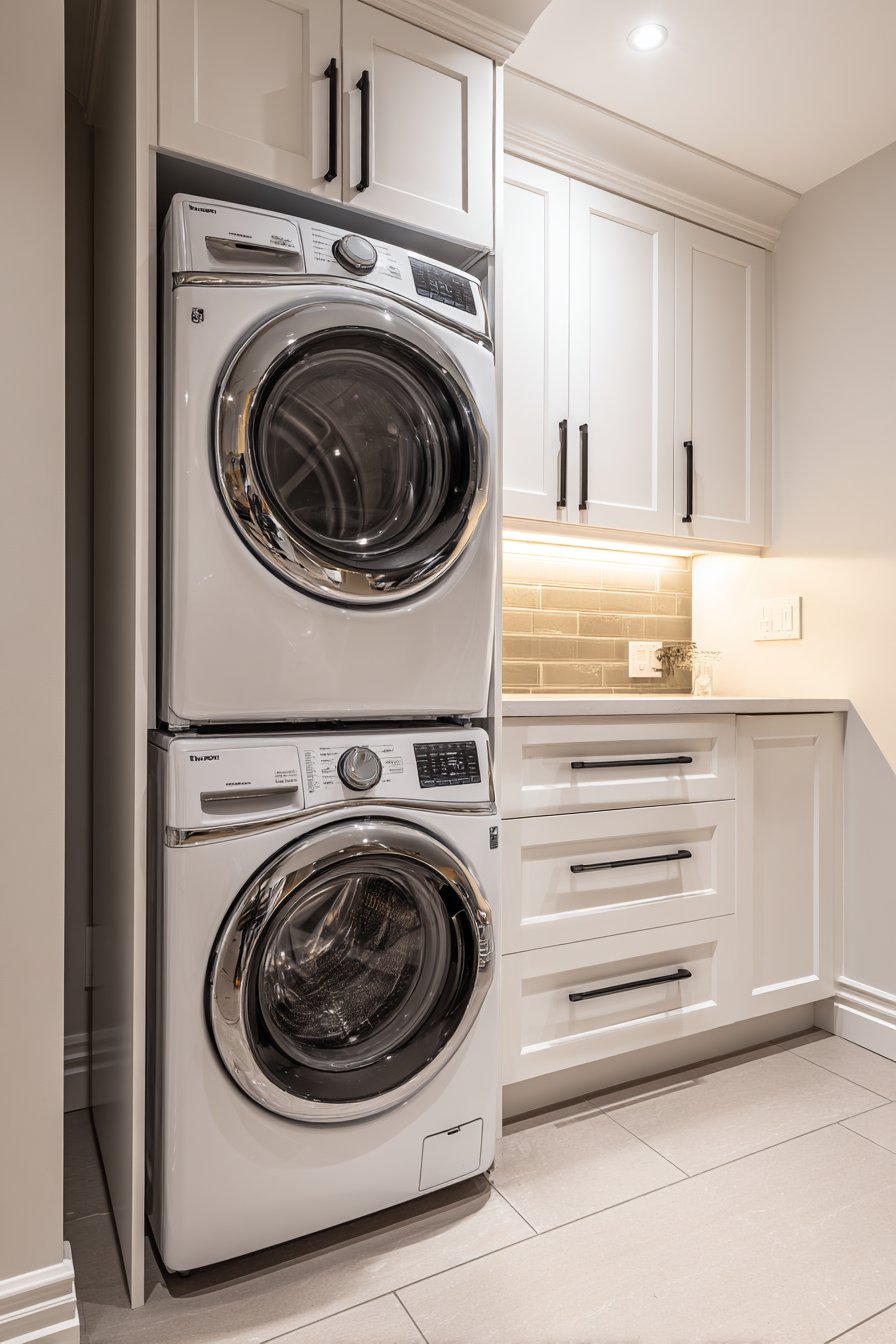
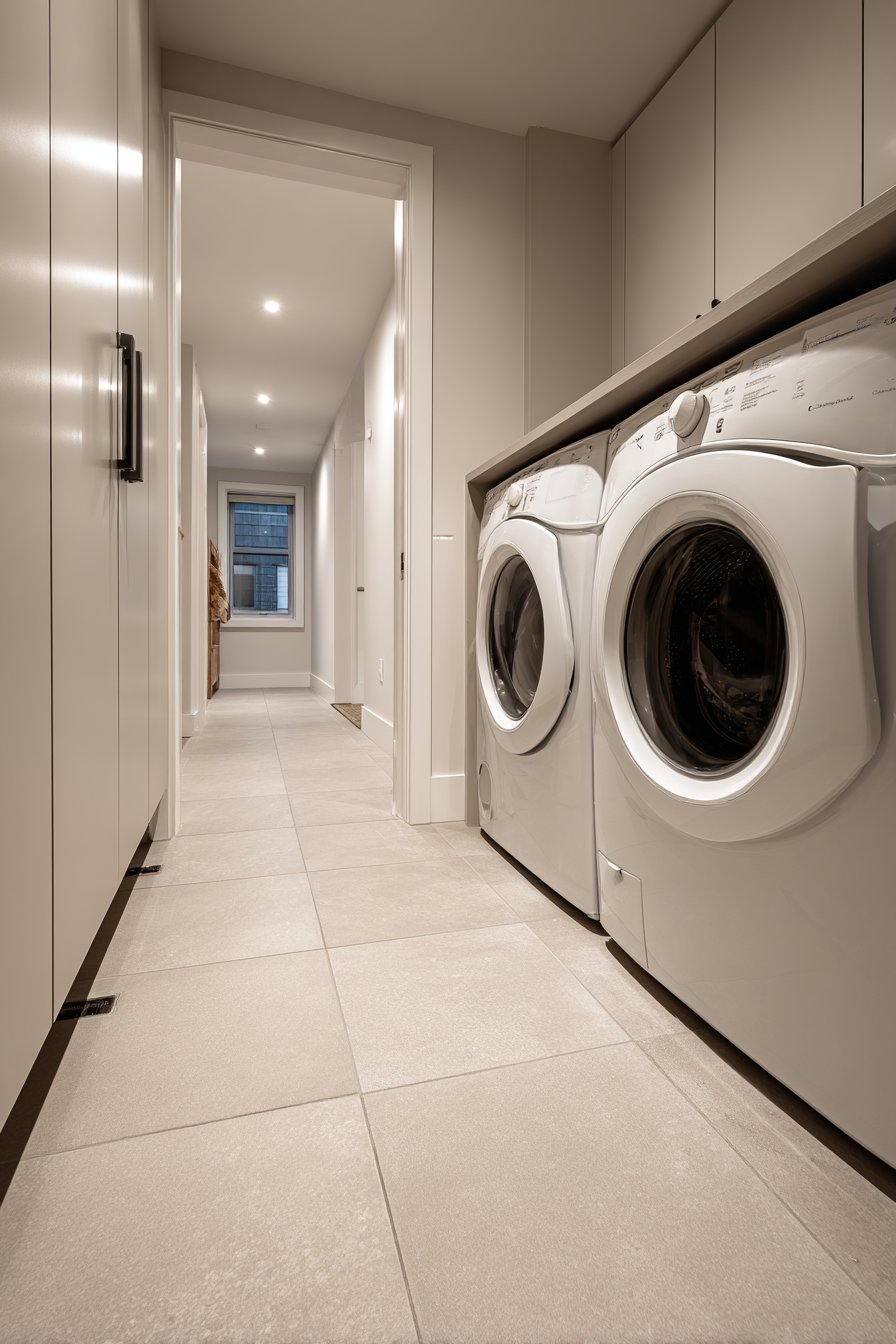
The arrangement of your washer and dryer dramatically affects how functional your laundry room feels. The two primary options are side-by-side placement and stacked configurations. Each has clear advantages depending on your space dimensions and workflow preferences.
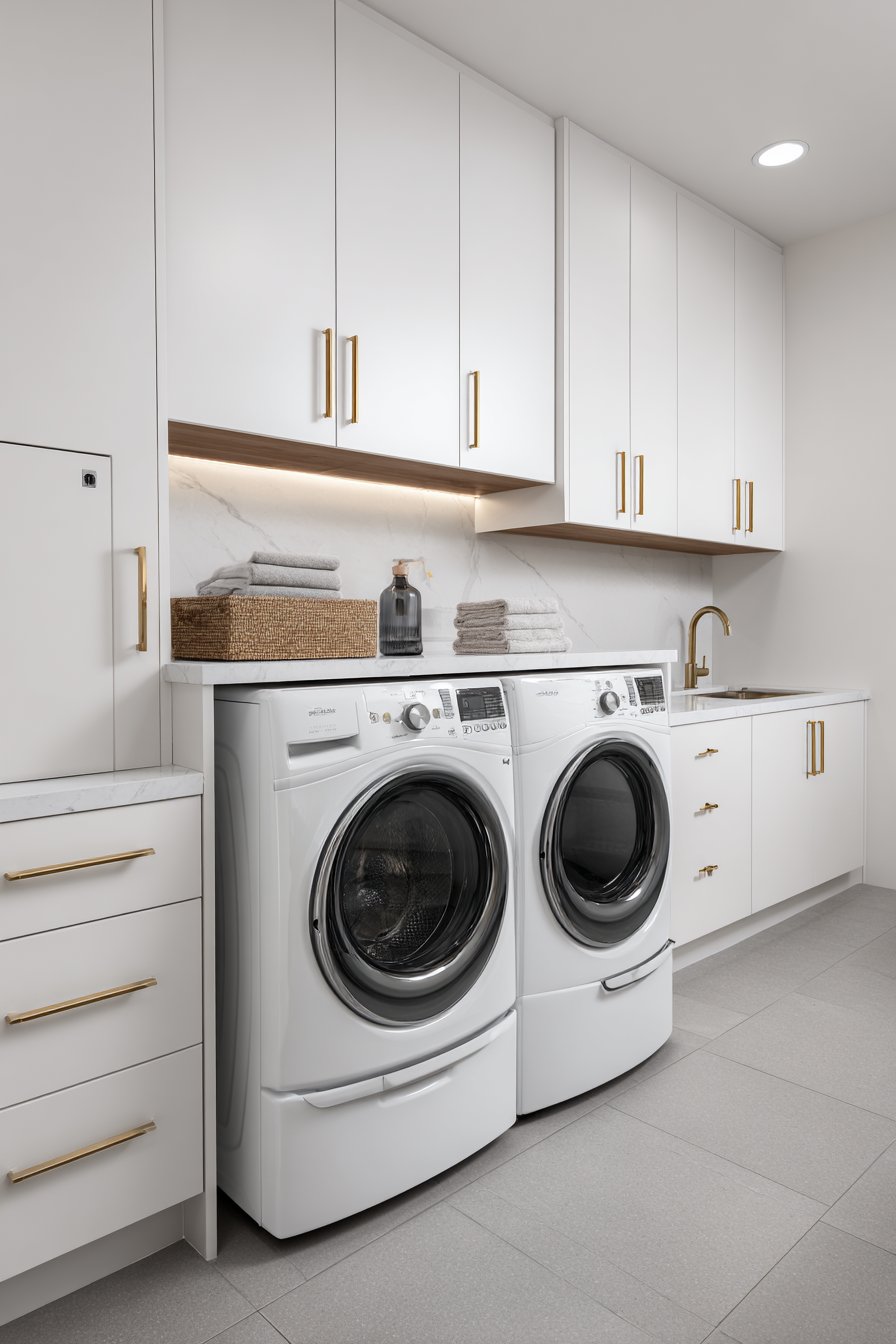
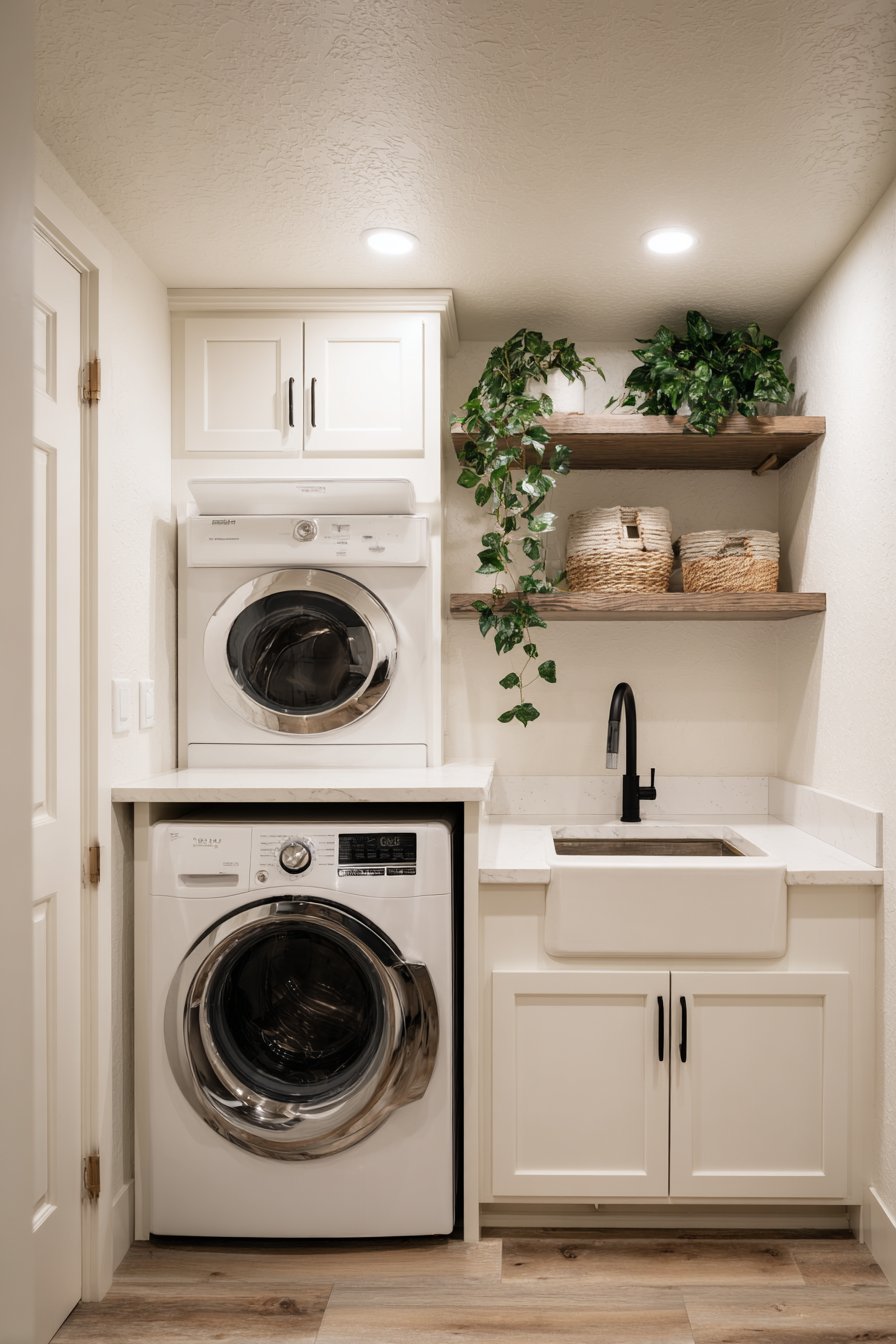
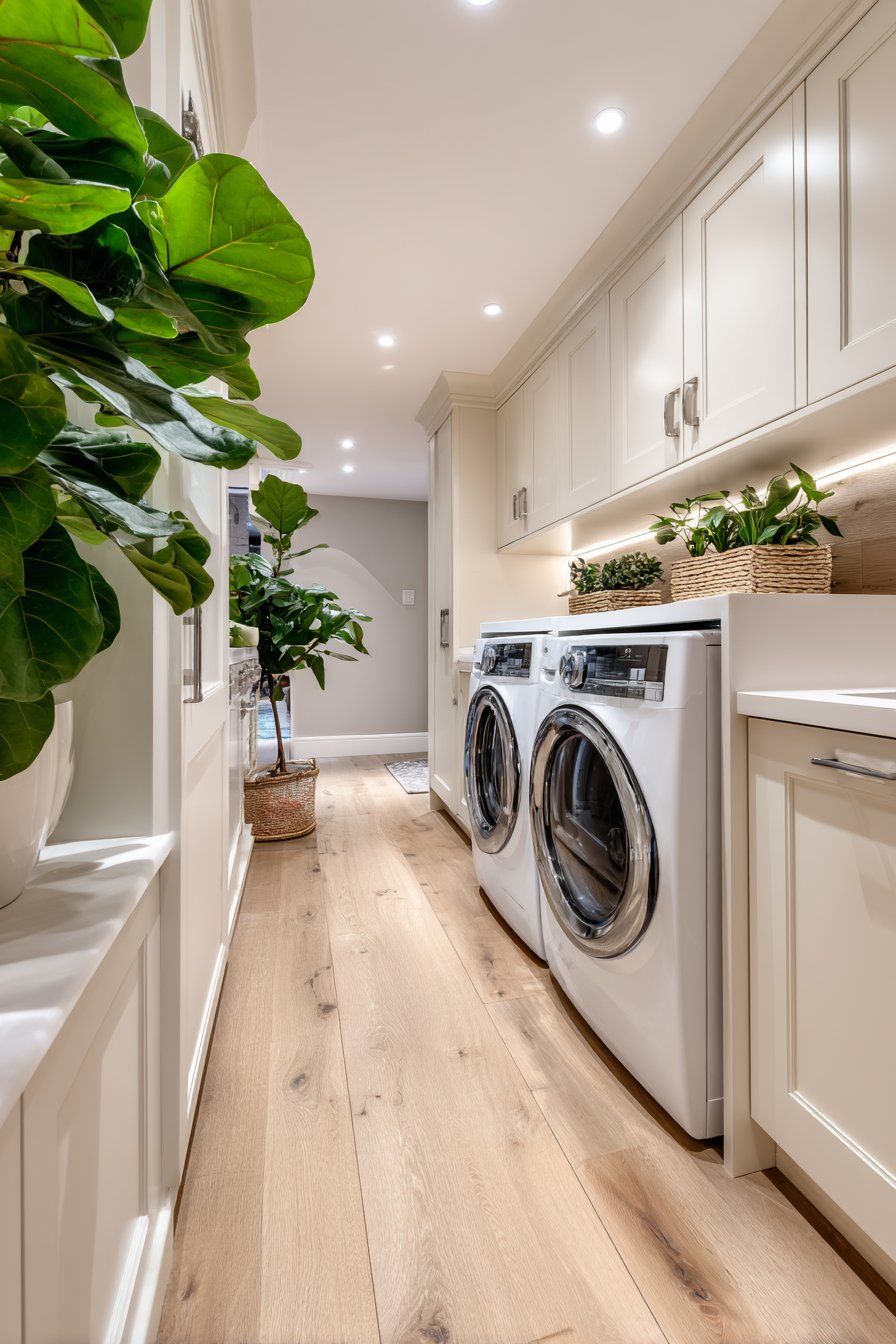
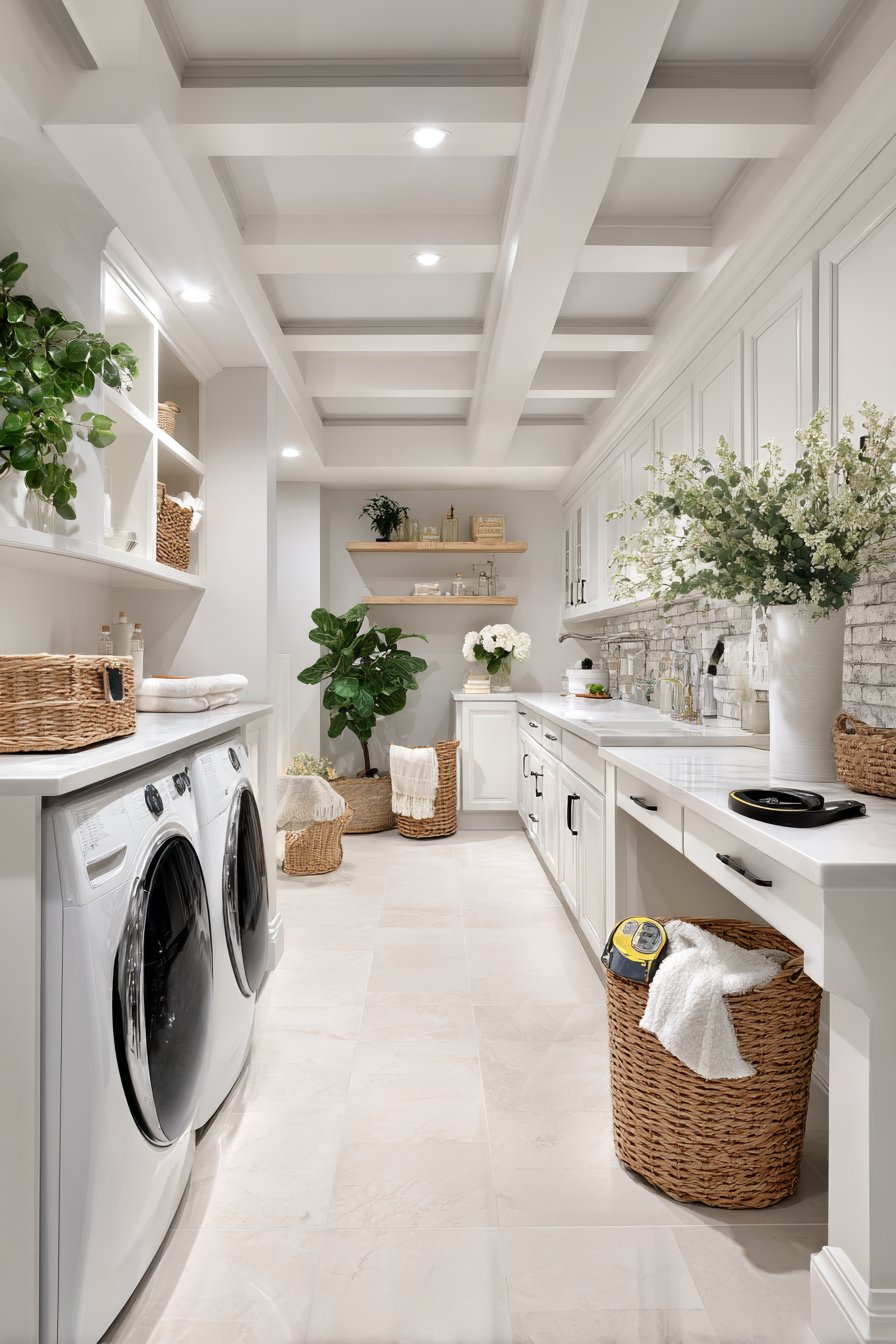
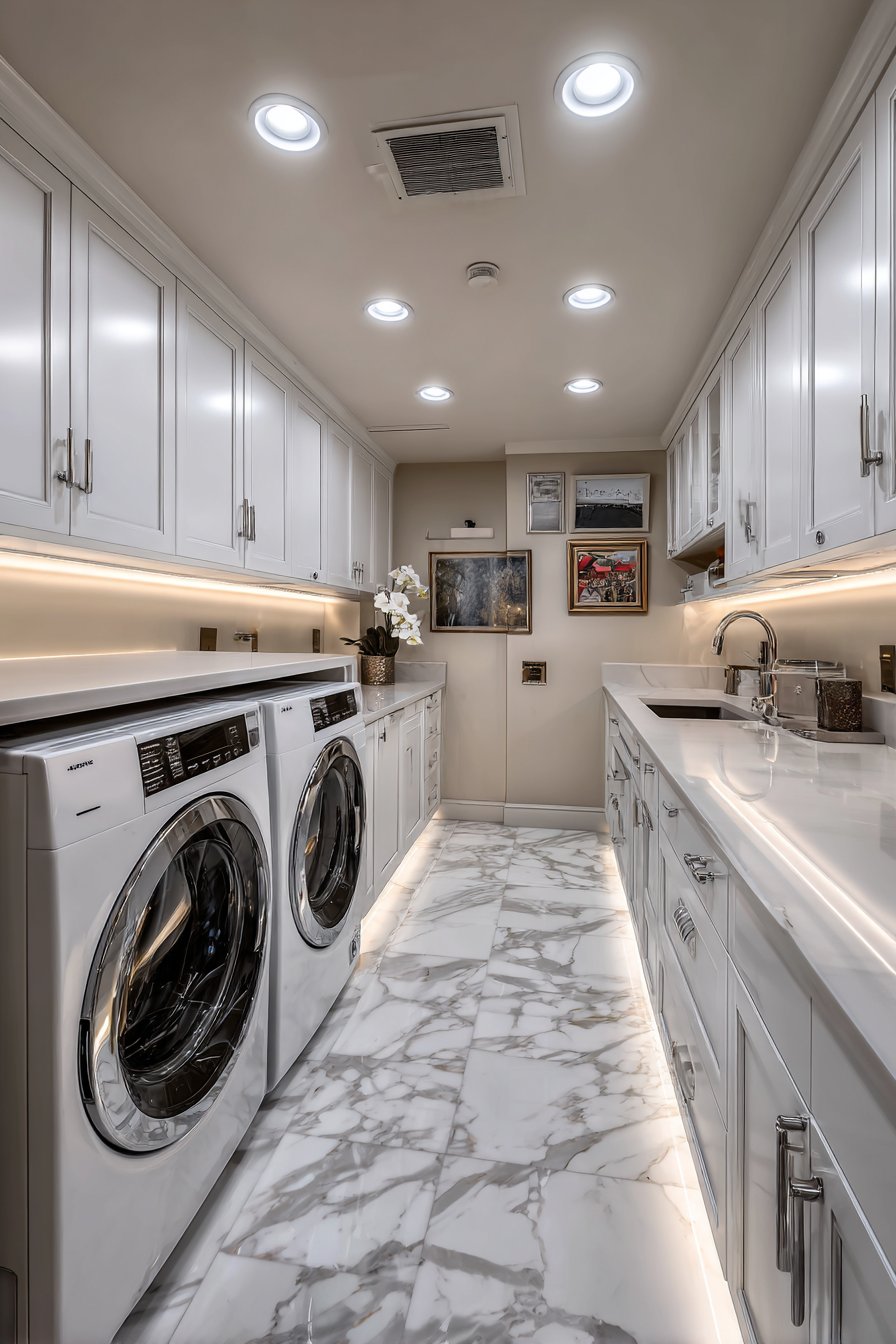
Side-by-side placement is ideal when you have ample floor space. It allows you to work comfortably between machines without bending. You can also add a countertop directly over both units, creating valuable folding surface that most basement laundry rooms desperately need.

Stacked washer-dryer units or stackable front-loaders work brilliantly in narrow basements. By occupying half the floor footprint, they free up significant wall and floor space for storage. However, the dryer sits at chest or eye height, which can be physically demanding for some users over time.
- Measure your space precisely before deciding between side-by-side or stacked units
- Choose front-loading machines if you plan to add a countertop above them
- Consider a pedestal drawer under front-loaders to raise them to a comfortable working height
- Allow at least 6 inches behind machines for ventilation hose connections
- Install anti-vibration pads under both units to reduce noise and movement
- Select Energy Star-rated appliances to reduce long-term utility costs
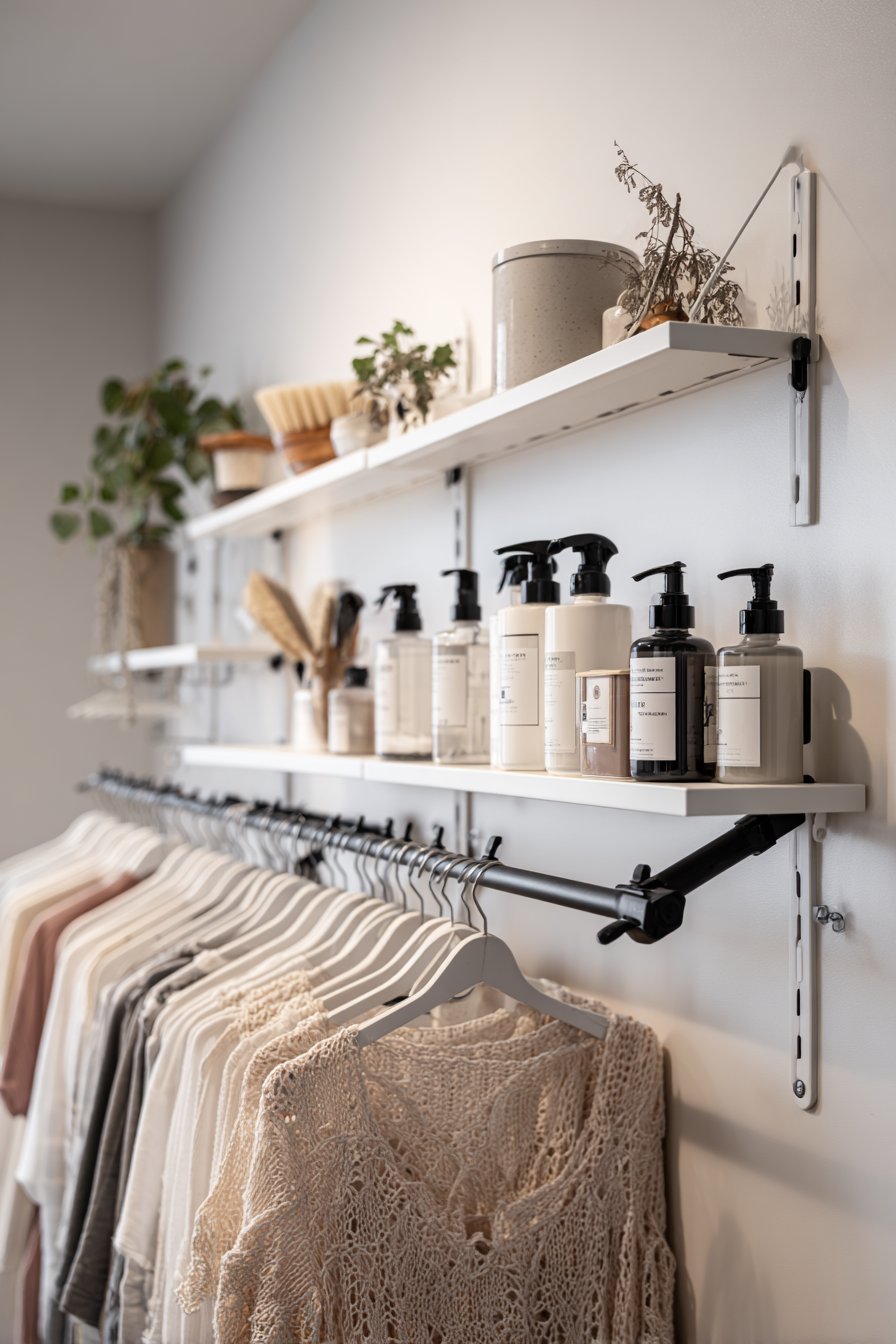
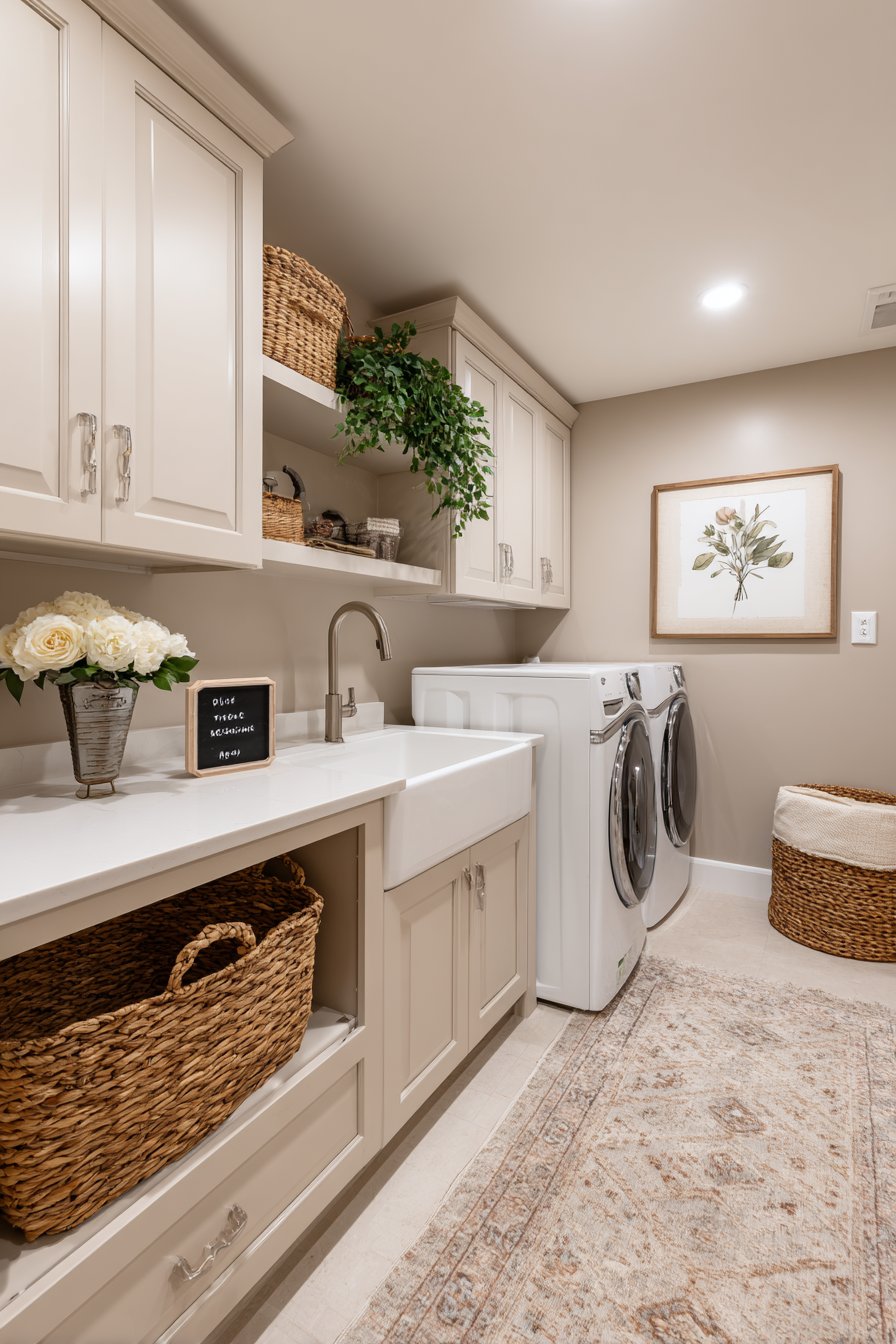
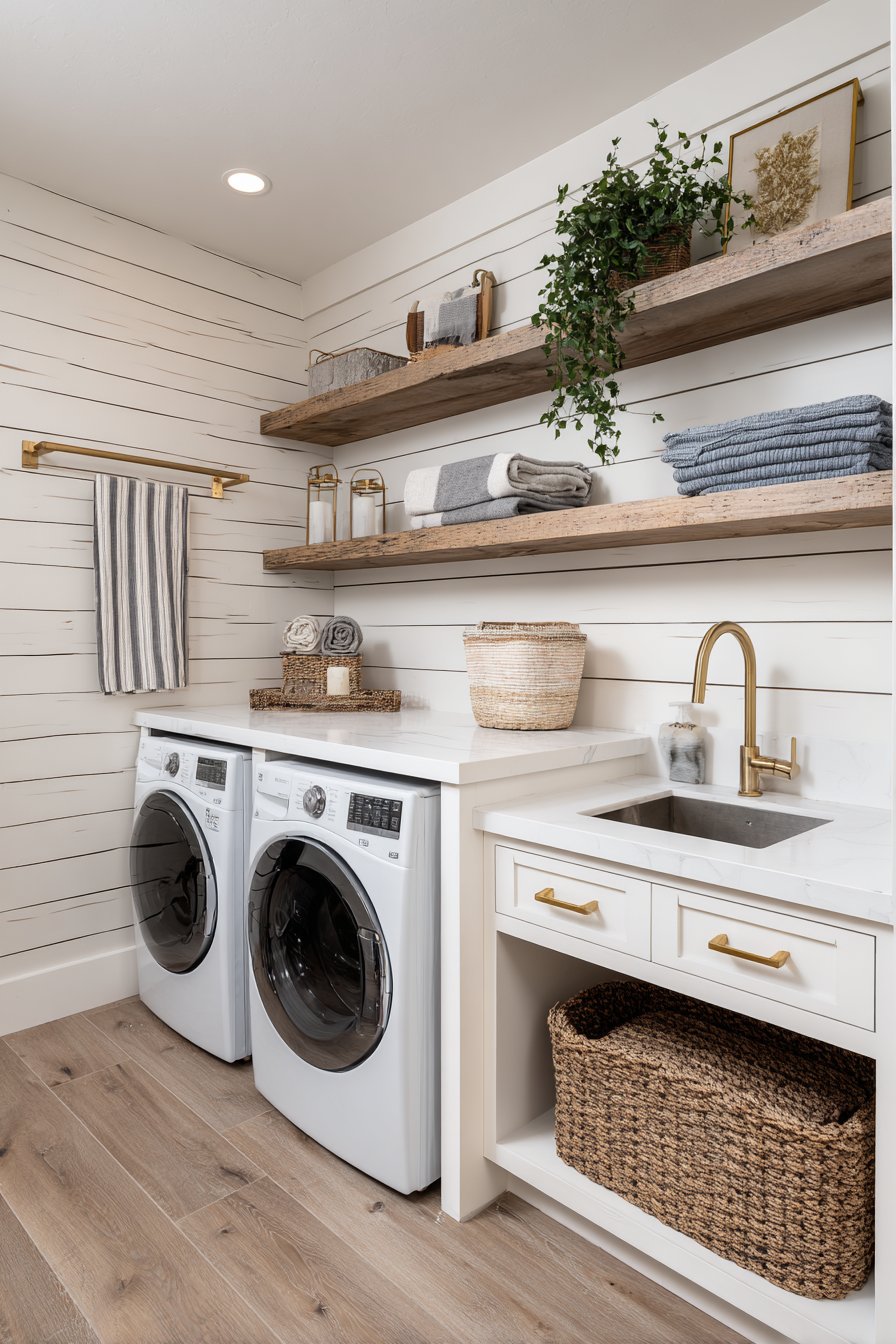
4. Design Smart and Abundant Storage Solutions
A laundry room without adequate storage quickly becomes chaotic. Detergent bottles, fabric softener, dryer sheets, stain removers, and sorting baskets all need a home. Purposeful storage design keeps everything accessible without creating visual clutter.
Upper cabinets above the washer and dryer are a highly efficient use of vertical space. Floor-to-ceiling cabinetry on an adjacent wall provides even more capacity. Use closed cabinet doors for items you want to conceal and open shelving for frequently accessed supplies and decorative touches.
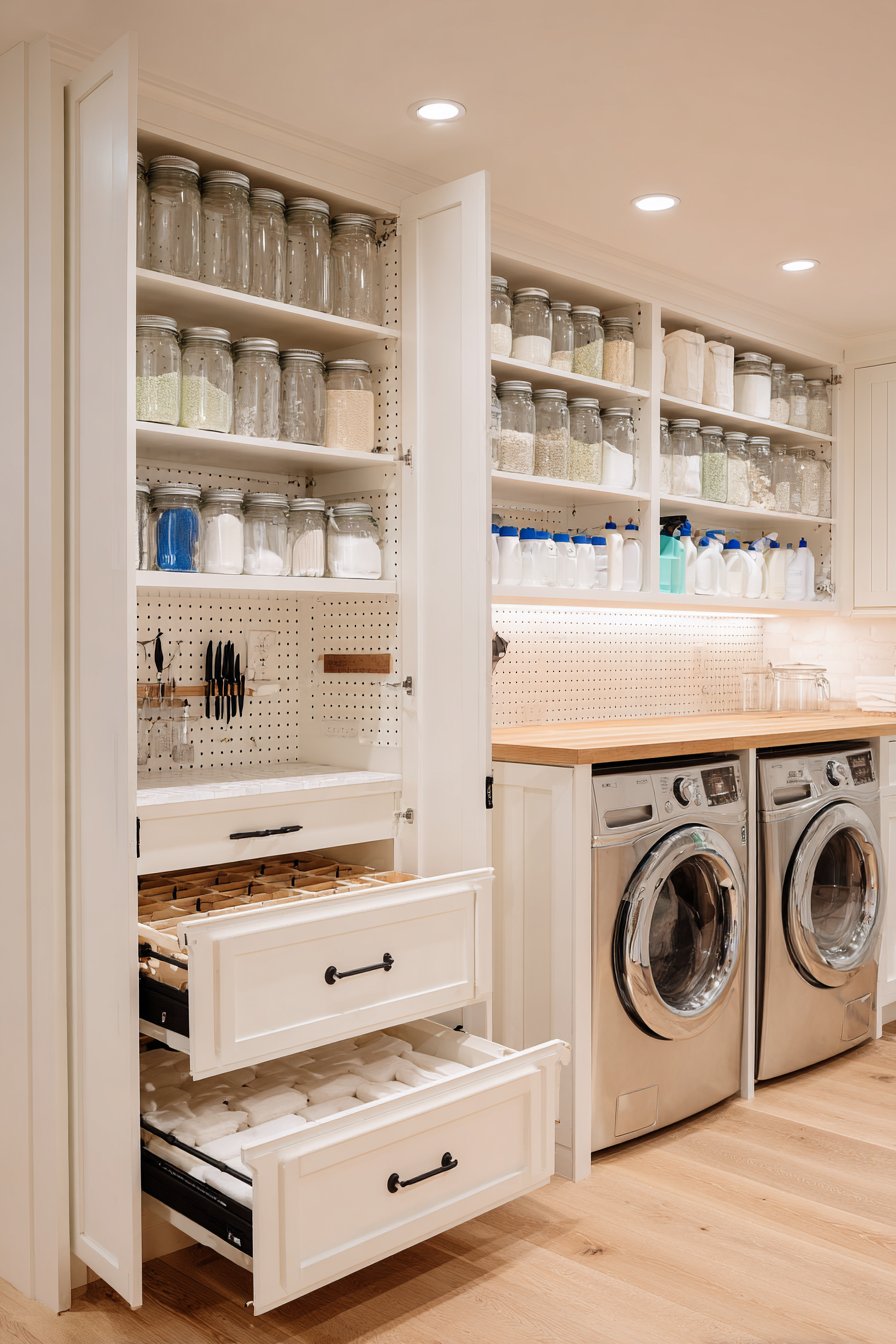
Built-in sorting systems are a game-changer for laundry workflow. A pull-out laundry sorter with three or four compartments for lights, darks, and delicates eliminates the need for separate hampers on the floor. This keeps the room clean and makes sorting laundry nearly effortless before each wash cycle.
- Install upper cabinets with adjustable shelving to accommodate bottles of varying heights
- Add a tall broom closet or utility cabinet for mops, vacuums, and cleaning tools
- Use pull-out drawer organizers to keep small laundry accessories neatly separated
- Mount pegboard on one wall for hanging tools, ironing accessories, and spray bottles
- Include a dedicated space for a laundry basket landing zone or built-in hampers
- Label shelves or use clear containers to keep supplies organized and easy to find
5. Install Proper Lighting for a Bright, Functional Space
Basements are naturally dark, and poor lighting turns laundry chores into a frustrating experience. You need to see stains clearly, read care labels accurately, and work comfortably for extended periods. Lighting is one of the most impactful and cost-effective upgrades you can make.
Recessed LED downlights provide clean, even ambient illumination across the entire room. Space them every 4 to 6 feet across the ceiling for consistent brightness without harsh shadows. LED fixtures consume significantly less energy than traditional fluorescent tubes and last far longer, making them a smart investment.
Task lighting specifically over the folding counter and sorting area adds a focused layer of brightness. Under-cabinet LED strips are an affordable and elegant solution that eliminates shadows on your work surface. For a finishing touch, consider a warmer color temperature (around 3000K) to make the space feel less clinical and more inviting.
- Install recessed LED downlights spaced evenly across the ceiling for ambient light
- Add under-cabinet strip lighting above your folding counter and sorting station
- Choose bulbs with a CRI (Color Rendering Index) of 90 or higher for accurate color perception
- Install a dimmer switch to adjust lighting intensity based on the task at hand
- Use bright white paint on walls and ceiling to amplify natural and artificial light
- Consider motion-sensor lighting for convenience when your hands are full of laundry
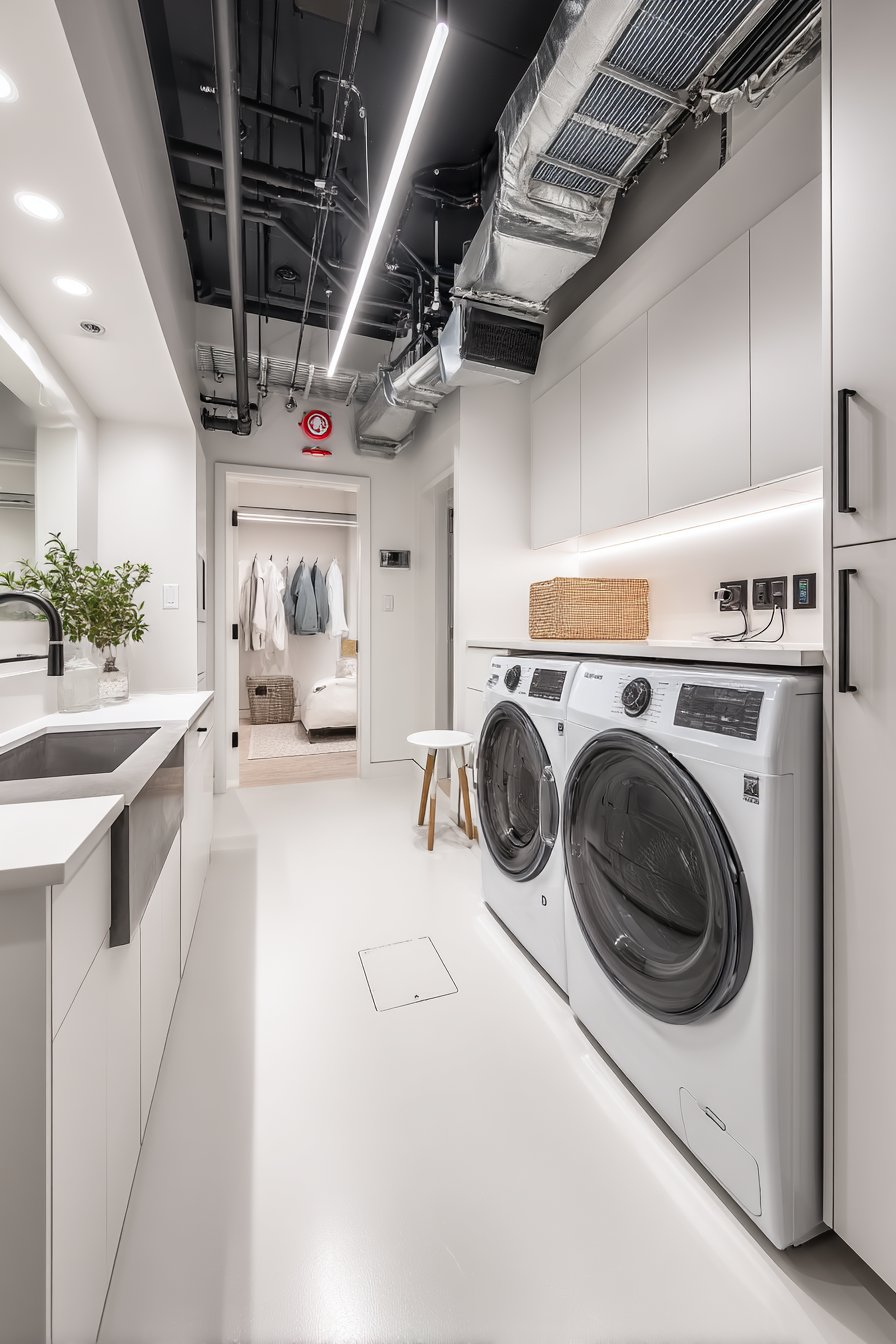
6. Address Moisture, Ventilation, and Air Quality
Basement laundry rooms are particularly vulnerable to moisture problems. Washing machines and dryers generate significant heat and humidity. Combined with a basement’s naturally damp environment, this creates ideal conditions for mold and mildew growth if ventilation is inadequate.
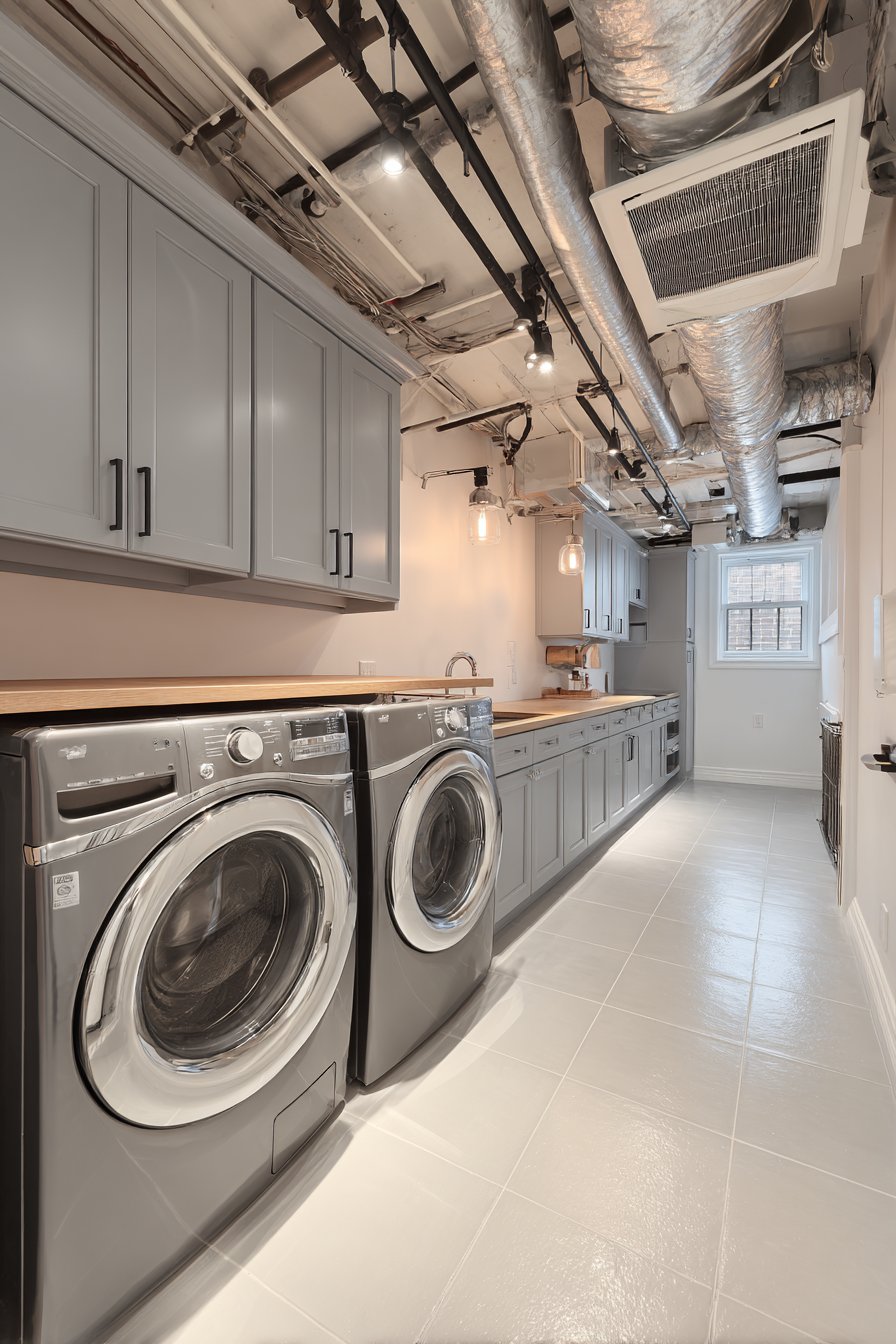
Proper dryer venting is non-negotiable. Your dryer must vent directly to the exterior of the home through a dedicated duct. Never vent a dryer into the basement space itself or into an attic — this is a fire hazard and a major moisture source. Use rigid metal ductwork rather than flexible foil, which can trap lint and restrict airflow.
A dedicated exhaust fan or dehumidifier helps manage residual moisture in the air. Install an Energy Recovery Ventilator (ERV) or a high-capacity bathroom exhaust fan rated for the room’s cubic footage. Running this fan during and after wash cycles dramatically reduces humidity levels and keeps the air fresh and healthy.
- Vent your dryer through rigid metal ductwork directly to the home’s exterior wall
- Install a dehumidifier rated for your basement’s square footage to control ambient humidity
- Run an exhaust fan during laundry cycles to remove steam and heat from the space
- Seal basement walls with waterproofing paint or membrane before installing any finishes
- Check dryer vent connections annually for lint buildup or disconnected sections
- Use mold-resistant drywall and grout in any tiled or finished areas of the laundry room
7. Select Durable and Water-Resistant Flooring
The flooring in a basement laundry room faces significant challenges. Water spills, detergent drips, and high foot traffic demand a surface that is tough, water-resistant, and easy to clean. Choosing the wrong flooring can lead to warping, staining, and costly repairs.
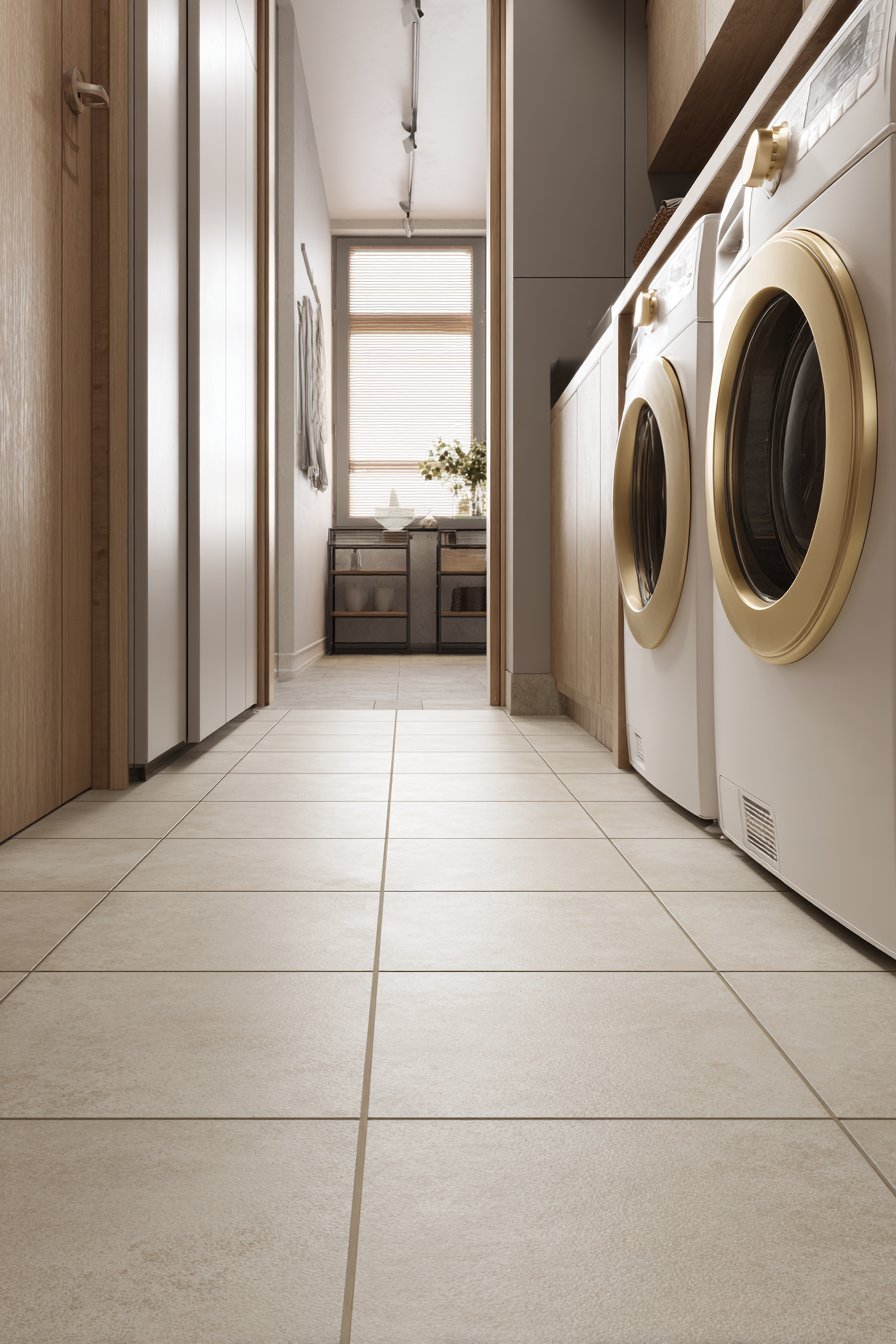
Ceramic or porcelain tile is the gold standard for laundry room floors. It is completely waterproof, durable, and available in a wide range of styles and sizes. Large format tiles (18×18 or larger) minimize grout lines, making cleaning faster and more effective. Non-slip finishes are a smart choice in any wet environment.
Luxury vinyl plank (LVP) is an increasingly popular alternative that combines water resistance with comfort underfoot. It is warmer than tile, softer to stand on during long folding sessions, and significantly easier to install as a DIY project. Look for products rated for below-grade (basement) installation with a 20-mil wear layer for maximum durability.
- Choose porcelain or ceramic tile for the most durable, water-resistant laundry room floor
- Select non-slip floor tiles rated for wet areas to prevent accidents near the washer
- Consider luxury vinyl plank as a budget-friendly, comfortable alternative to tile
- Install a floor drain beneath or near the washer as a safeguard against leaks and overflows
- Use a waterproof transition strip between laundry room flooring and adjacent carpet areas
- Apply a penetrating sealer to natural stone or concrete floors for enhanced moisture protection
8. Maximize Wall Space with Functional Features
Walls in a laundry room are far more valuable than most people realize. Every inch of vertical surface is an opportunity to add functionality and organization. Thoughtful wall design can transform even a small basement laundry room into an impressively efficient workspace.
A fold-down ironing board mounted to the wall is a brilliant space-saving solution. When not in use, it folds flat against the wall and takes up virtually no space. When needed, it extends to a full-size ironing surface in seconds. This eliminates the need for a bulky freestanding ironing board that clutters the floor.
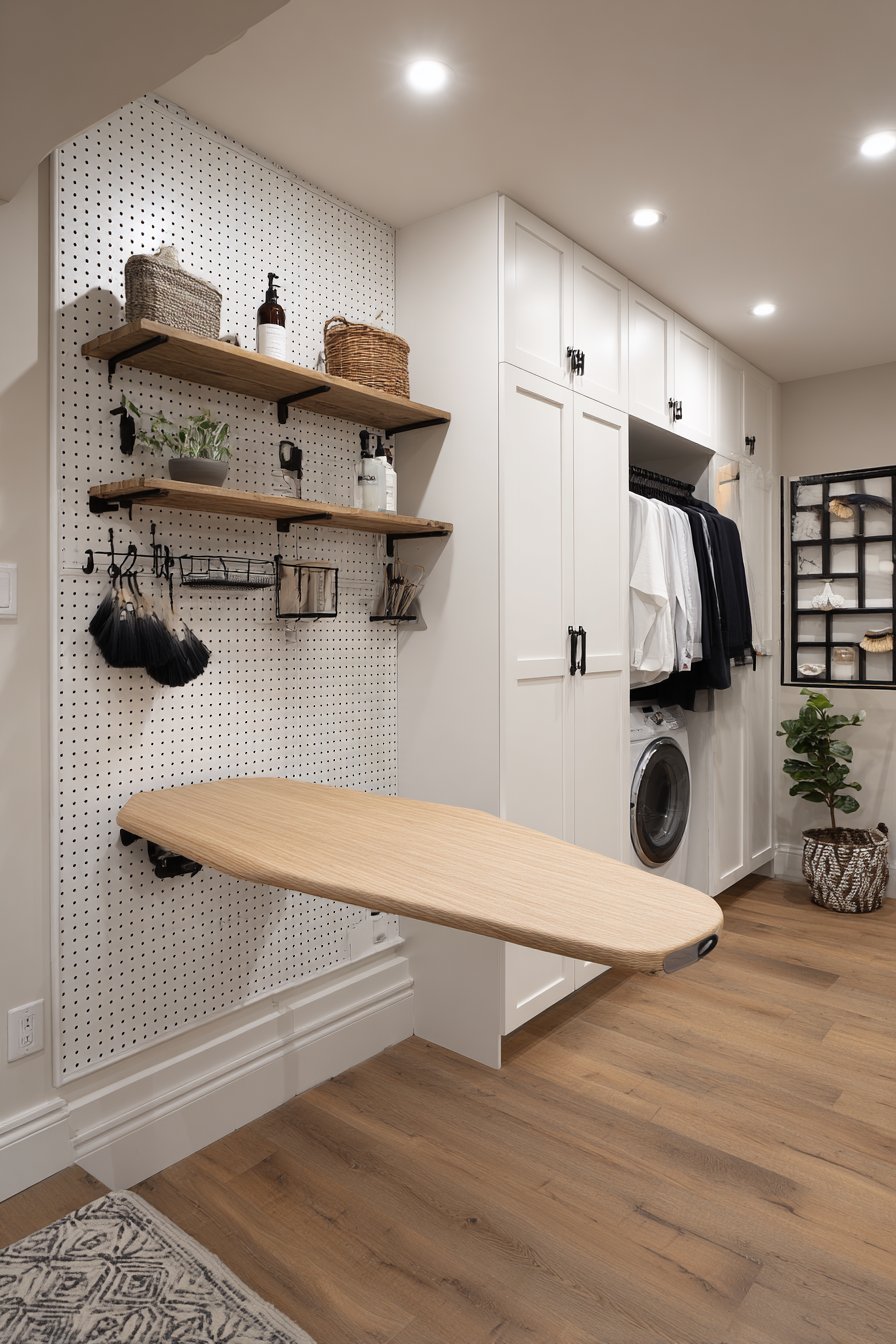
A retractable drying rack or wall-mounted drying bar provides space for air-drying delicates without taking up permanent floor space. Install it above a sink or along an open wall section. For households that air-dry frequently, a ceiling-mounted pulley drying rack (called a Victorian maid or Sheila Maid) offers even greater drying capacity.
- Mount a fold-down ironing board on the wall to save floor space and increase utility
- Install a wall-mounted retractable drying rack for air-drying delicate garments
- Use a pegboard wall section with hooks for hanging tools, brushes, and accessories
- Add a wall-mounted soap dispenser for liquid detergent to reduce countertop clutter
- Install a small wall shelf or magnetic strip for frequently used items like stain sticks
- Consider a chalkboard or whiteboard panel for tracking laundry tasks and reminders
9. Create a Dedicated Folding and Sorting Station
One of the biggest mistakes in laundry room design is neglecting the folding workflow. Clothes that come out of the dryer need an immediate, comfortable place to land. Without a proper folding station, clean laundry ends up in wrinkled piles on the floor or basket. A dedicated folding counter changes your entire laundry routine.
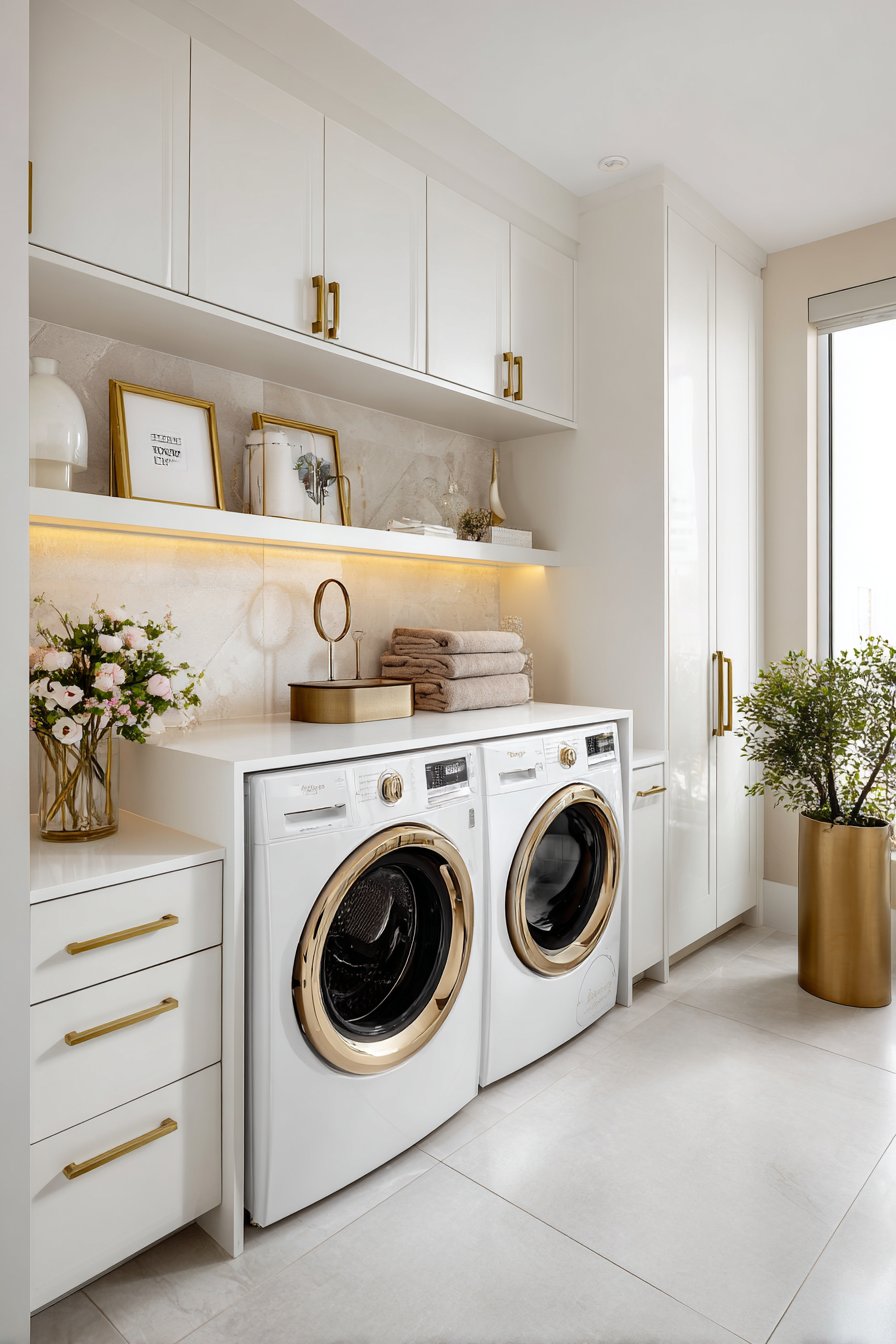
The ideal folding countertop runs the full width of your side-by-side appliances and extends further if space allows. A depth of 24 to 30 inches provides enough room to fold even large items like bed sheets and towels comfortably. Laminate, butcher block, or quartz countertops all work well in this application.

Sorting stations adjacent to the folding counter keep organized laundry from getting mixed back together. Labeled bins or baskets for each household member — or each room — make putting laundry away faster and more efficient. This household sorting system reduces the time clothes spend sitting in the laundry room and keeps the space looking tidy.
- Install a countertop directly over side-by-side front-loading appliances for folding space
- Choose a countertop depth of at least 24 inches for comfortable garment folding
- Add labeled baskets or bins below the counter for sorted, folded laundry by family member
- Include a hanging rod above or beside the counter for items that should not be folded
- Use drawer inserts within lower cabinetry to organize folding accessories and supplies
- Keep the countertop surface clear of permanent items to maintain maximum usable workspace
10. Incorporate a Utility Sink for Maximum Functionality
A utility sink is one of the most practical additions you can make to a basement laundry room. It serves countless purposes beyond laundry — from hand-washing delicates and pre-treating stubborn stains to cleaning paint brushes and rinsing muddy boots. Its versatility makes it a worthwhile investment in any functional basement.
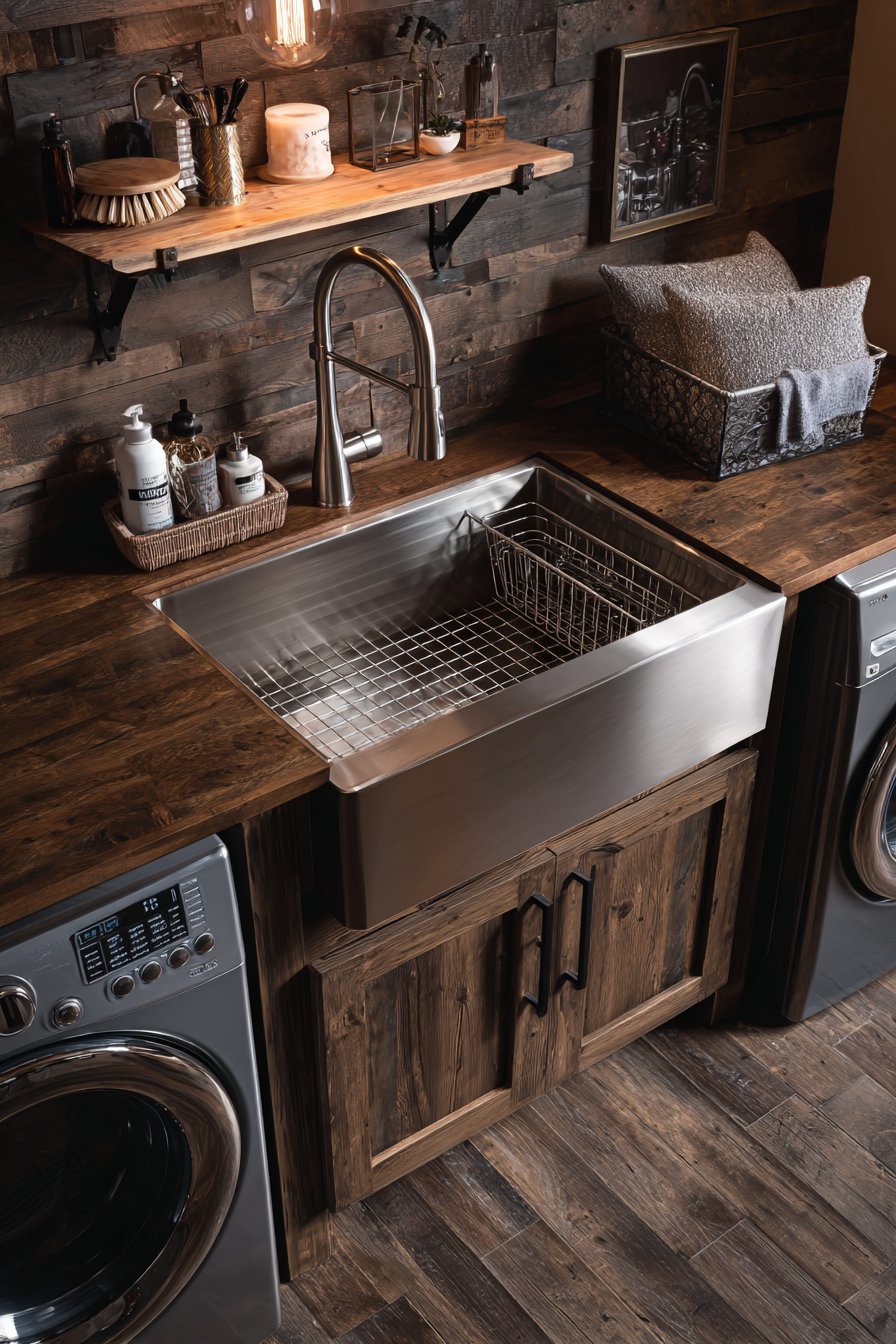
Deep basin utility sinks (typically 10 to 12 inches deep) are preferable over shallow versions for most laundry room applications. They handle large items like soaking comforters or rinsing mop heads without splashing. Stainless steel, fireclay, and heavy-duty plastic are all excellent material choices that hold up to heavy use.
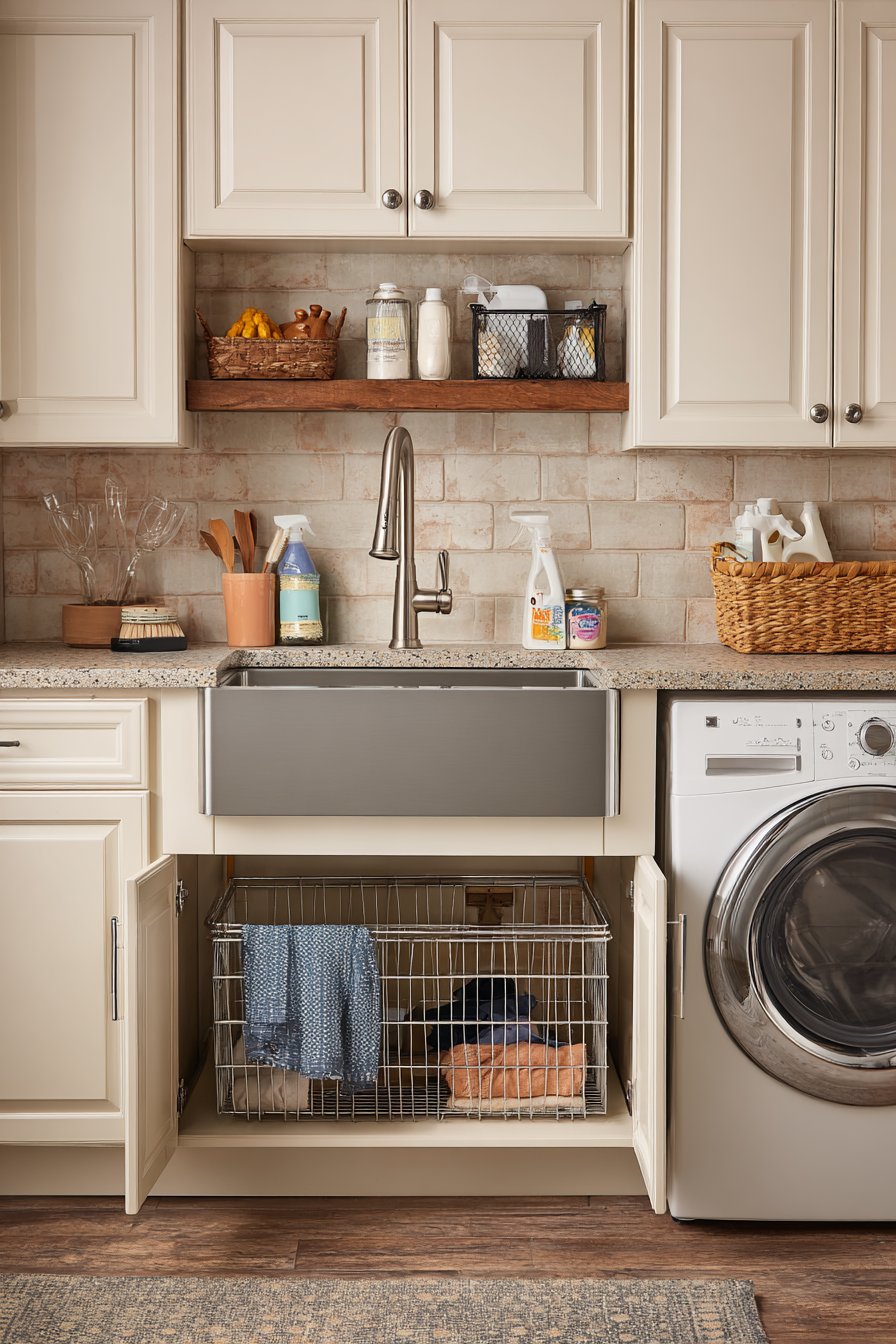
Position the utility sink adjacent to the washer for the most logical workflow. This allows you to move wet items directly from the sink into the washing machine. Adding a pull-out spray faucet increases the sink’s versatility further, making rinsing and filling tasks significantly easier and more comfortable.
- Choose a deep basin utility sink (10-12 inches) over a shallow version for maximum versatility
- Install a pull-out spray faucet for easier rinsing, filling buckets, and cleaning tasks
- Position the sink directly adjacent to the washer for a smooth pre-wash workflow
- Add a shelf or small cabinet directly above the sink for hand-washing supplies
- Include a drying mat or draining board beside the sink for wet items
- Ensure the sink drain is properly connected and vented according to local plumbing codes
11. Add Thoughtful Finishing Touches and Décor
A functional basement laundry room does not have to feel cold or institutional. Thoughtful finishing touches elevate the space from purely utilitarian to genuinely pleasant. When you enjoy the environment, laundry chores feel less burdensome and you are more likely to maintain organization long-term.
Paint is the most affordable way to transform the atmosphere. Light, neutral shades like soft white, pale gray, or warm greige brighten the space and make it feel larger. Alternatively, a bold accent wall in a vibrant color adds energy and personality without overwhelming the room. Use moisture-resistant interior paint formulated for high-humidity areas.
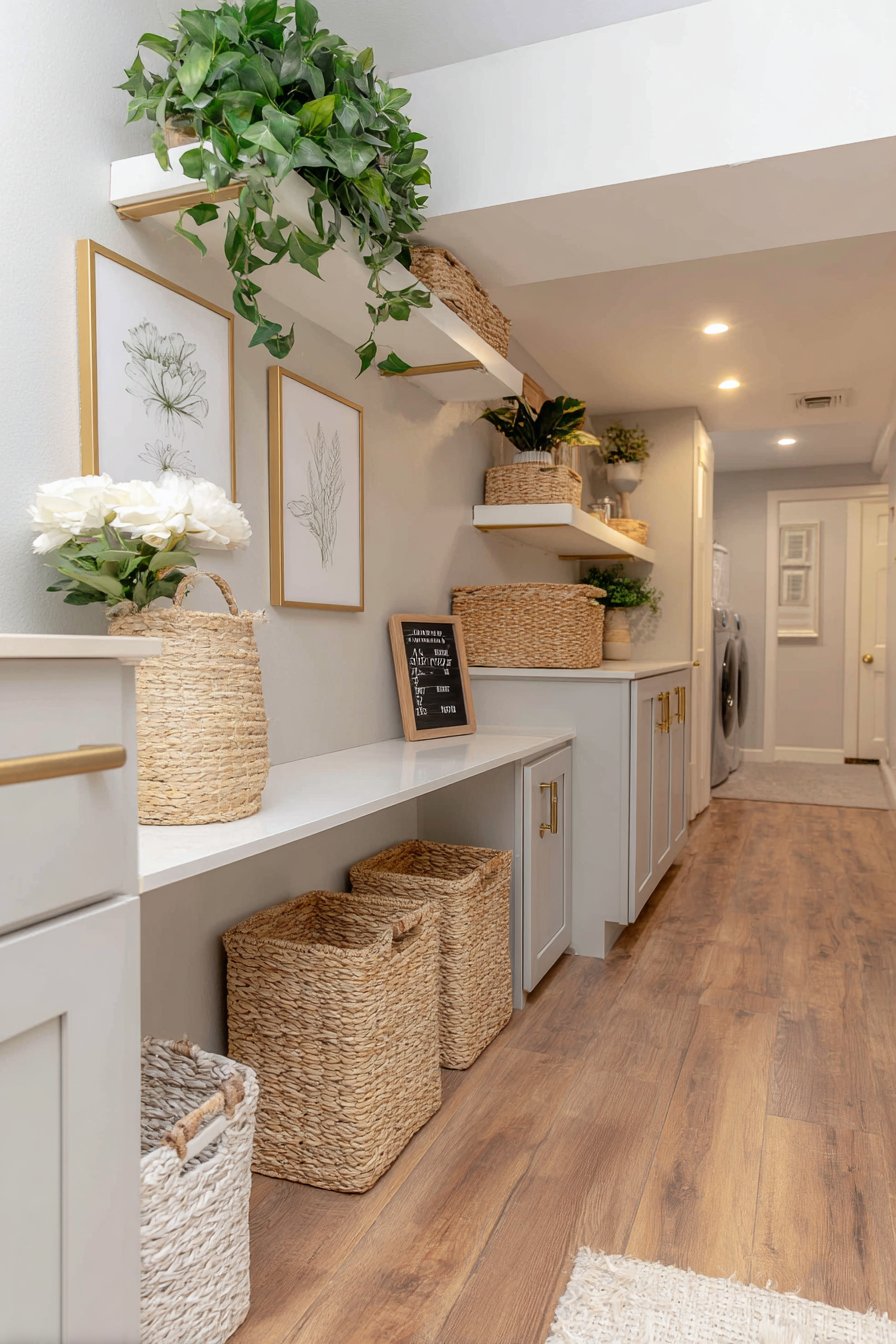
Small decorative elements add character without interfering with function. A framed print, a small plant (snake plant or pothos thrive in low light), or a stylish laundry sign personalizes the space. Replace basic builder-grade hardware on cabinets with brushed nickel or matte black pulls for an instant upgrade that costs very little but makes a noticeable visual impact.
- Paint walls with moisture-resistant paint in a light, airy color to brighten the basement space
- Add a small pothos or snake plant for a touch of life that thrives in low-light conditions
- Upgrade cabinet hardware to brushed nickel or matte black for an elevated, cohesive look
- Install a Bluetooth speaker or smart display for entertainment during laundry sessions
- Use matching storage containers and labels for a curated, organized aesthetic
- Hang a simple framed print or inspirational quote to make the space feel intentional and warm
12. Plan for Safety and Code Compliance
Safety is non-negotiable in any laundry room, especially in a basement where GFCI protection, proper ventilation, and fire prevention are critical. Overlooking code requirements can result in failed inspections, voided insurance policies, or serious safety hazards.
All electrical outlets near water sources must be GFCI-protected (Ground Fault Circuit Interrupter). This is particularly important around the utility sink and washer. Your electrical panel must have dedicated circuits for both the washer and dryer — a 20-amp circuit for the washer and a 30-amp 240-volt circuit for an electric dryer.

A smoke detector and carbon monoxide detector should be installed in any basement laundry room that contains a gas dryer or gas water heater. Lint buildup in dryer vents is a leading cause of residential fires, so clean your dryer vent annually and inspect connections regularly. These simple habits protect your home and family.
- Install GFCI-protected outlets at all locations within 6 feet of any water source
- Ensure dedicated electrical circuits for both the washer (20-amp) and dryer (30-amp, 240V)
- Mount smoke and carbon monoxide detectors if a gas dryer or water heater is present
- Clean the dryer vent ductwork at least once per year to prevent lint fire hazards
- Pull necessary permits before beginning significant plumbing or electrical work
- Have a licensed inspector review finished electrical and plumbing work before use
Conclusion
Designing a functional basement laundry room requires careful planning, but the results are well worth the effort. By addressing plumbing, ventilation, lighting, storage, and finishes thoughtfully, you create a space that genuinely improves your daily household routine. Every decision, from appliance configuration to flooring choice, contributes to a room that works as hard as you do.
Start with the fundamentals — layout, plumbing, and electrical — then build outward toward storage, aesthetics, and finishing details. Even modest budgets can produce beautifully functional laundry rooms when priorities are clear. Your basement laundry room has the potential to become one of the most efficient and satisfying spaces in your entire home. Begin planning today and transform that underutilized basement corner into a room you are genuinely proud of.